

In the first post about understanding the WordPress database, I described the basics and how to change options and your password directly from the database. This post will be all around shrinking your database. The other day, I logged into mine to see that it had suddenly jumped to 70 megabytes. I had just done some maintenance, so I began to investigate because I was moving dangerously close to my storage limit with my host.
Why is it important to shrink your database?
- Because you pay for the space you use on your host, and the database uses that space.
- Because tables can become so large that you won’t be able to move them if you get a new host.
- Because large databases that aren’t optimized may cause your site to run sluggishly.

WP Commentmeta Table full of Akismet Artifacta
Check out Akismet’s damage
This may not affect you, especially if your blog is younger than mine. Akismet is a decent spam blocking tool. You probably use it. It it is intended to keep two weeks worth of spam comment data then delete that data from your database. Older versions didn’t always delete correctly, however. This means you could have junk entries in your database for years.
I did. In fact, my “wp_commentmenta” tables were upwards of 10 megabytes. This became an issue when I was trying to move to my new host. I went into browse mode and quickly saw that almost all of the rows were related to Akismet. My next step was to Google whether this was necessary data, and the answer was a resounding “No!” I could delete that information manually, but I had thousands of entries.
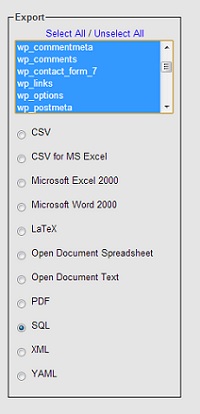
The easiest way is to run a query to look for data in that table that doesn’t correlate to data in “wp_comments.”
So I logged into PHPMyAdmin, and clicked “SQL” Then, I entered this query:
DELETE FROM wp_commentmeta WHERE comment_id NOT IN (SELECT comment_id FROM wp_comments)
You may have to edit the name of the tables if your installation uses a prefix. Click “Go.” If prompted, click “Ok” to continue. This shrunk my tables by dozens of megabytes, so it was a good start.
Delete Unused Tables
When you delete plugins, the actual files disappear, but developers rarely code plugins so that they remove unneeded tables. The first step to remove this data is to look at the names. As I did this for one of my blogs, some tables quickly stood out as created by plugins that I no longer use. These include “fssstats” and some for YARRP, a related posts plugin that I had swapped for another. When you see tables like this, check them and select “Drop” from the drop-down menu. You’ll be prompted to continue.
As long as you’re no deleting the twelve tables that WordPress creates, which I talked about here, you won’t do irreversible damage. You could break something that you want but likely nothing that you’ll need. I simply spent a lot of time Googling table names. This frequently brings up threads in the WordPress forums. I repeated that process quite a few times, but the tables I wound up dropping entirely were really much smaller than the wp_commentmeta tables that contained all those Akismet artifacts.
If you’re curious about whether you can delete a table, go ahead and leave the table name here. I’m more than willing to do what I can to help.
Optimize your database
I recommend doing this after you delete any large chunks of information because there will be a lot of “orphaned” data. This is data that is no longer attached to anything in your database. After deleting dozens of megabytes of data from Akismet, I used WP Optimize to get rid of a few more megs. This plugin does a few things, including some new features that clear up space in your database:
- Delete revisions
- Clear spam
- Remove trackbacks and pingbacks (I keep mine)
- Remove post drafts
- Delete transient options
- Clear orphaned postmeta
Even if you’re not deleting large chunks of data, optimizing on a regular basis is a good idea, especially if you frequently save posts. You could have dozens of revisions per post. This plugin now allows you to automatically optimize. I have mine set to optimize on a weekly basis but, to be honest, I manually do it every day.
You can also optimize your database directly from PHPMyAdmin. After logging in to PHPMyAdmin, click on the database name. Select any tables that you’d like to optimize or simply select “Check All.” From the drop-down menu in the bottom of the page, choose “Optimize Tables.” This doesn’t delete all the extra information from your installation, but it’s handy to know.